
*We’re committed to transparency. Products marked with an asterisk were given to us to try by the brand. As always, all thoughts expressed on Rouge18 are our honest opinions.
About the Collection
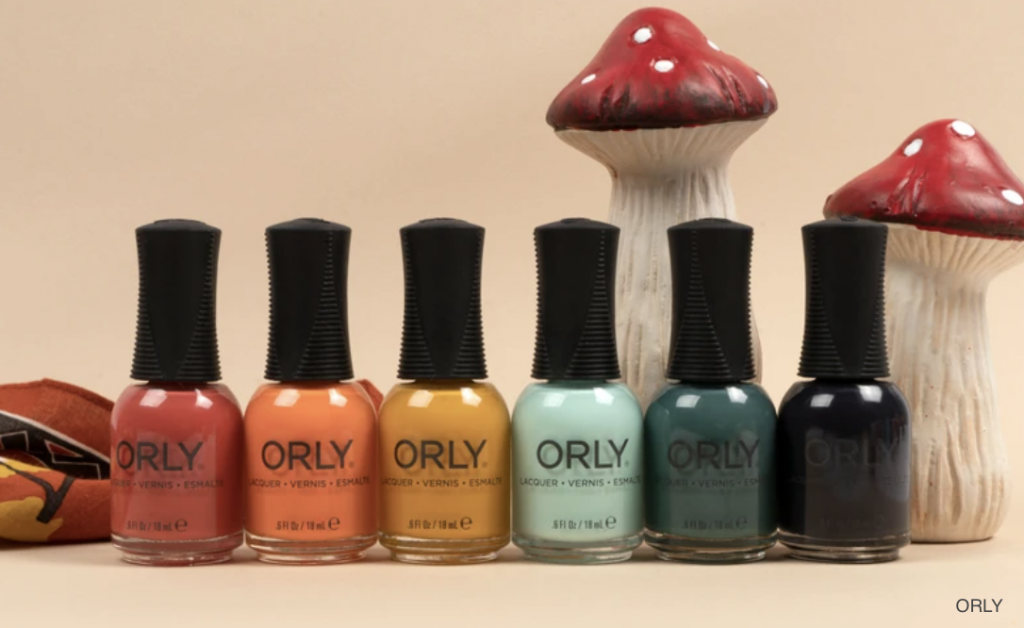
A blast from the past, ORLY’s Day Trippin’ Spring Collection is inspired by the 70s! I’ve been a long-time ORLY fan and this is perhaps my favorite collection. The color story is phenomenal, a beautiful mix of 6 warm and cool shades all perfect for spring. I loved the colors so much, my featured manicure involves all of the colors in the collection. All 6 shades are available in ORLY’s long-wearing Lacquer formula as well as their GELFX formula.
This week’s manicure drew inspiration from the groovy 70s vibes that inspired the collection. Read on to see how I did it!
What You’ll Need
1. IMK Nails Peel Eze Peel Off Base Coat (opt for a different base coat if you want a long-lasting mani)
2. Moyou London Holy Shapes 10 Stamping Plate
3. *ORLY Nail Polish in “Happy Camper,” “Let the Good Times Roll,” “Kitsch You Later,” “Can You Dig It,” “Feeling Foxy,” & “Here Comes the Sun”
4. *Smith & Cult Nail Lacquer in “Cool your Jets”
5. Polished for Days Soft Focus Basecoat – Neutral
6. Maniology Ice Cube Stamper & Scraper
7. TwinkledT Stamping Polish in “Glow Up”
9. Moyou London’s Smudge Resistant Premium Top Coat
10. *Zoya Naked Manicure Glossy Seal Top Coat
I used nail stamping to achieve this look. For detailed explanations and video tutorials of nail stamping check out our In-Depth Guide to Nail Stamping.
How To
Step 1: Apply IMK Nails Peel Eze Peel Off Base Coat to all nails. This is a peel-off base coat. If you are looking for long wear time, elect for a normal base coat such as the ORLY Bonder Rubberized Base Coat.
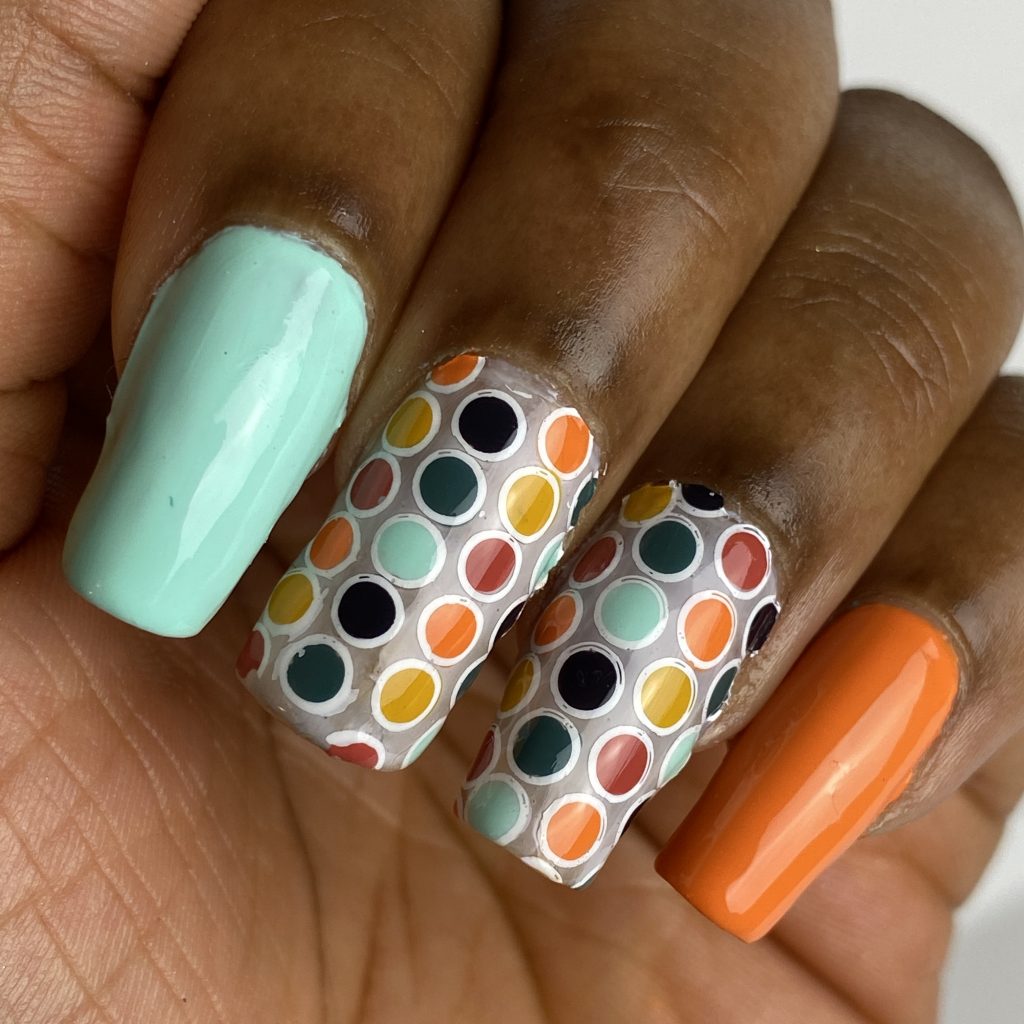
Step 2: Apply 2 coats of ORLY Nail Polish in “Happy Camper” to your index finger.
Step 3: Apply 2 coats of ORLY Nail Polish in “Kitsch You Later” to your pinky finger.
Step 4: On the thumb, middle, and ring fingers, apply 1 coat of Polished for Days Soft Focus Basecoat – Neutral followed by 1 coat of Smith & Cult Nail Lacquer in “Cool your Jets” once dry.
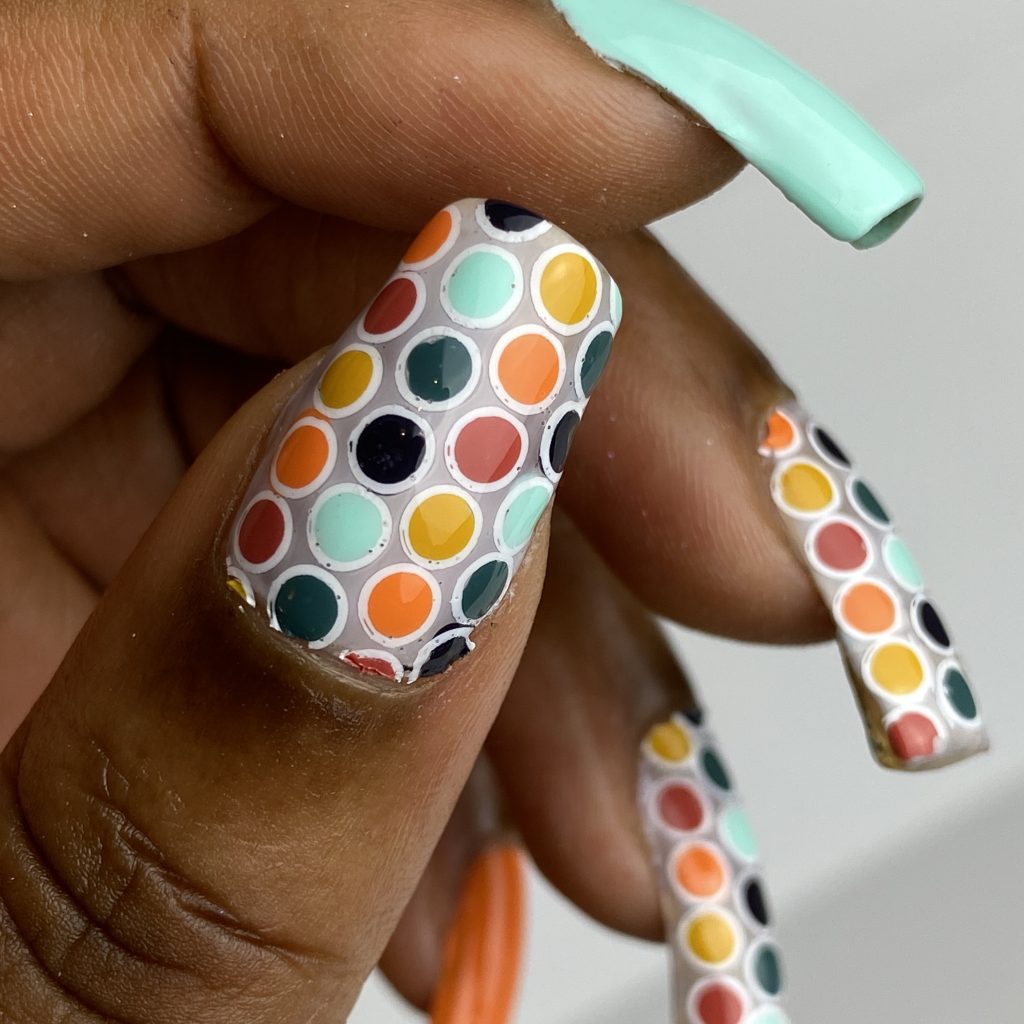
Step 5: Use the reverse stamping technique to create the dots images. First, pick up the image from the Moyou London Holy Shapes 10 Stamping Plate using the Maniology Ice Cube Stamper & Scraper and TwinkledT Stamping Polish in “Glow Up”. Then, fill in the dots with
ORLY Nail Polishes in “Happy Camper,” “Let the Good Times Roll,” “Kitsch You Later,” “Can You Dig It,” “Feeling Foxy,” & “Here Comes the Sun.” Do this 3 times to create the images for three nails. Allow the stamps to dry.
Step 8: Apply a thin layer of Maniology Sticky Base Coat to your thumb, middle, and ring fingers. Let it sit for 60-90 seconds or until tacky.
Step 9: Apply the dots stamps you created in Step 5 to your thumb, middle, and ring fingers.
Step 10: Apply Moyou London’s Smudge Resistant Premium Top Coat to your thumb, middle, and ring fingers to prevent your stamping designs from smearing in the next step.
Step 11: Apply Zoya Naked Manicure Glossy Seal Top Coat to all nails to seal in your manicure.
The Final Look
Can’t get enough? Check out more Rouge18 nail stories here!